Sleep Better with a DIY Charging Station
As soon as my youngest child started sleeping through the night, I thought I would too. After three kids and four years of at least one of them waking up all night long, I thought I was finally going to settle into years of good, quality sleep.
I even thought that I would begin aging backwards because (of course) sleep plays a huge role in how I look and feel.
Unfortunately, my body had other ideas. It was used to being up at random hours all night long. It was used to watching TV while feeding a child at 1 am and having kids crawl into my bed at 3 am.
When it came to sleeping, my body was messed up.
So I worked to sleep train myself. I stopped drinking caffeine at noon. I instituted a strict 10 pm bedtime policy for myself. I made our bedroom a relaxing and calm environment.
And still I was waking up at 2 am every night. unable to fall back asleep.
Finally, I took the final step in my sleep training journey by removing all cell phones and electronic devices from the bedroom.
I’m not going to lie, it was hard. I thought it would be hard because I could no longer reach for it when I woke up at 2 am or to check in on the world when I woke up in the morning.
I was right. It was hard to break those habits.
What I didn’t anticipate were the practical challenges that removing cell phones brought.
- I now have an old-school flashlight next to my bed (instead of being able to use the flashlight on my phone) for when a child does need me at midnight.
- I installed a landline phone next to my bed so people can reach me just in case there’s an emergency. Or. you know. I can call for help myself.
- I brought out our old alarm clock since I would no longer have my phone to do it for me. (Although. who am I kidding? Our kids wake us up before our alarm clock every day of the week.)
The Results?
I’m sleeping better than ever. Removing cell phones from the bedroom means I no longer reach for my phone and get sucked in when I do wake up in the middle of the night. And most nights, I don’t even wake up at all anymore.
I also find that I’m a little calmer when I greet the family in the mornings before I’ve had a chance to read the bad news that happened the night before or see drama on social media. It’s really, really nice to not take in the world news until after my first cup of coffee in the morning.
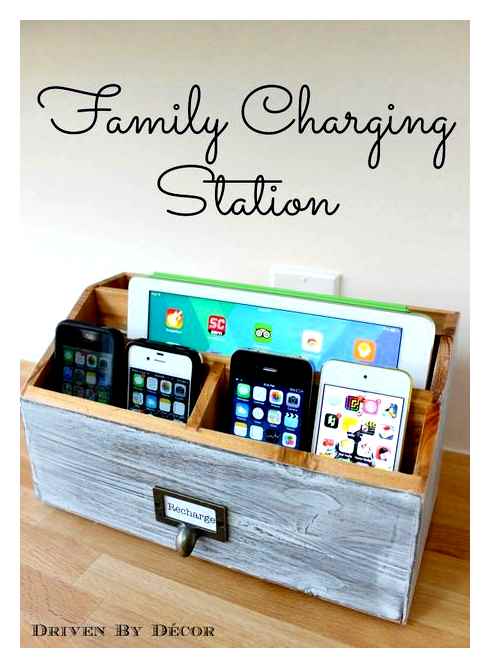
You know what else I love? The DIY Charging Station I created to house all of our electronic devices while we’re sleeping.
We’re no longer dealing with un-charged devices or scrambling to find chargers or figure out who left the iPad where.
Even my husband has been using it to charge his phone overnight. which was a huge step!
How to Create a DIY Charging Station
Whether you decide to get better sleep for yourself and your family by setting up a family charging station outside of the bedrooms. or you just think it makes a lot of practical sense. this DIY charging station is both functional and beautiful (if I do say so myself.) And it’s very simple to create.
DIY Charging Station in a Nightstand
Most of the projects we do around our house come about because something starts bugging me. Something is inconvenient or in the way. It’s hard to get to or just plain ugly. And eventually it bothers me enough that I can’t help but do something about it!
This exact scenario played out recently with my nightstand.
I was storing all of the devices that I use often in one of the drawers– my eReader, Airpods, and FitBit, plus I would park my phone there at night. But I was getting frustrated because my devices never seemed to be charged when I needed them.
I didn’t have enough outlets to charge everything at once. Some of the devices were sharing one charging cord, so if they were both out of battery I had no way to charge them both. And the chargers I had were plugged into an extension cord that laid on the floor looking messy.
I finally decided that I’d had enough and recruited Donnie to help me turn the top drawer of my nightstand into a DIY charging station for all of my devices.
Grab our free organizing guide, 7 Simple Starting Points!
This quick guide gives you 7 simple, practical ways to begin to tackle an overwhelming organizing project. (And once you get started, the momentum will help you keep going until it’s complete!)
This post contains affiliate links. For more information, see my disclosures here.
Supplies you’ll need
- Nightstand with drawer(s)
- Velcro fasteners
- Extension cord
- Charging cords for devices
- Power strip
- Bins for devices (optional)
- Cordless drill and spade drill bits
- Drawer liner (optional)
Step 2- Drill holes for the power strip cord.
After clearing out the top drawer of my nightstand, we had to create a way for the cord of the power strip to be able to exit out the back of the nightstand.
Some nightstands may come with a hole already created in the back of the drawer for something like this. If that’s the case for you, great! You get to skip this step.
If your nightstand is like mine, though, and doesn’t have a way for the cord to exit the back of the nightstand, it’s time to break out the drill!
We used a cordless drill with a spade drill bit to create a hole in the drawer that was big enough for our cord to get through. (Ours was a 1 3/8″ bit.)
Since our nightstand drawer was not easily removable, we just left it in place as we drilled the hole. If removing the drawer is an option for you, it will definitely be easier to maneuver the drill if you take it out!
We were able to approximate the placement of the hole in the drawer and created a hole of the same size on the back of the nightstand itself so that the holes lined up. Again, we used a spade drill bit to create the hole.
Step 3- Attach the power strip to the drawer.
Once I had a way to get the cord where I needed it, I was able to attach the power strip to the back of my drawer.
I used two sets of Scotch velcro fasteners on the back of the power strip to adhere it to the nightstand drawer.
I was then able to thread the cord through the holes we had created and plug in the power strip to an extension cord, which plugged into the wall.
All of the cords fell behind the nightstand, staying neatly tucked out of sight– yippee!
Note: You’ll want to make sure your cords are long enough to have a little give. This will allow them to move back and forth when you open and close the drawer.

Step 4- Plug in your devices in your charging station!
Once my power strip was attached to the drawer and ready to go, it was time to plug in my devices. I played around with the placement a little bit until I found an arrangement that worked best for me.
I ended up putting my phone closest to the bed so I could easily reach it. For my phone, I used a 6′ cable because often by the end of the day, it is low on battery, so I will keep it plugged in while I’m using it. The longer cord allows the phone to be easily reachable from the bed while it is plugged in. When the phone is sitting in the drawer, I just coil up the cord and everything sits neatly.
I used shorter cords for the other devices so they wouldn’t get all tangled up and messy.
Step 5- Add bins or trays if desired.
To keep my devices and cords neat and tidy, I decided to use small bins to divide up the drawer and give each device a designated home. The bins also helped to hide the cords a little more so the drawer has a neater appearance overall.
How to DIY a Charging Drawer in a Nightstand
You can have a charging drawer in your nightstand within minutes with minimal tools and only for the cost of a power strip! You don’t need to pay for expensive gadgets and you don’t need to do significant modifications to your drawers.
Who doesn’t want to stash away the cord mess created by the multiple devices we each own and plug in overnight? A phone, smartwatch, tablet, Echo dot, a lamp … Before you know it, the top of your nightstand is looking like a tangled web and is the opposite of the clean and calming environment you need to drift away to sleep. (Read my post on achieving that Fluffy Bed Look from the catalog pages.)
Factory-made charging nightstands
I chose my previous nightstands partly because they came with a built-in power strip in the drawer. I thought that I needed to pay extra for that factory-installed functionality but when I received the nightstands, I realized the special feature is as simple as a power strip with an opening for the cord to plug into the outlet.
Simple Materials Guide
Get this FREE GUIDE to different types of trim and molding materials for your every DIY need – from wall molding to cabinetry!
So when I refreshed my bedroom, I chose the nightstands I really liked even though they didn’t come with a built-in charging station. I knew I could make a DIY charging drawer inside the nightstand myself.
But if you don’t own a drill and want to consider some ready-made charging nightstands, here are some good ones currently on the market:
Some great budget-friendly options from Amazon:

DIY charging drawer
It’s as simple as drilling a hole in the back of your existing nightstands. You will need a special large-hole drill bit. I used a drill bit for boring hinge holes which is not the best option. Use one of the drill bits from this kit instead. Then fish the cable from a power strip through the hole. Make sure the hole you drill is wide enough for the plug to pass through it. If you can remove the drawer, it will be even easier to fish the plug through. The back of the drawer doesn’t extend all the way up to the top so there is enough room for the cable to sit in that space.
This is the power strip I used. It also has three USB ports (not shown in photo.)
I only charge my devices overnight – usually, just my phone and Apple Watch – and leave the drawer open. I’m not concerned about overheating but if you are, this should put your mind at ease.

Measurements
Product needs recalled. Scott S. I bought this for my iPhone 12 mini which fits on the pad perfectly! Twice in a row I have woken up late for work because my alarm never went off. Why? My phone died while on this charger! When going to bed I put my phone on it, ensured it was centered perfectly and charging was started. 7 hours later my phone is completely dead. Doesn’t make sense at all. First night I had my phone standing up, second night I put my phone laying down on it. Both nights same issue. Based on other reviews mentioning the same issue, it looks like the are obvious flaws with this charger. IKEA NEEDS TO STOP SELLING THIS PRODUCT IMMEDIATELY. I will definitely be returning this useless product. 1
Looks pretty Nancy L. I recently purchased this charger because it looks so sleek. I didn’t know you had to remove the case for it to charge. I’m still trying to decide if I will invest in a new case and keep the charger. 3
I was very excited to JONI I was very excited to try this, and my phone immediately started charging, but some time overnight, connectivity was lost and it never charged completely. Will be returning it 1
Great charger! Janessa I bought this charger because I have an old cell phone I use pretty much strictly as an alarm clock and I thought it would be great to have this to prop it up. The charger works great, BUT, do NOT have your phone on vibrate because it will fall off every time it goes off, and the strip to keep it stationery is too small. I have to reposition my phone every now and then, but whatever. I don’t know if its worth 20, but it is very handy, and compared to other wireless chargers I’ve bought, works so much better! 4
Doesn’t really work Tiffany D. I bought this charger last year because it was nice looking and I thought it would be convenient to keep next to the couch. However, it will only charge for a couple of seconds, maybe a minute before it quits working when it’s on the stand. 1
Wanted to love it Michael D. My wife and I saw this when we walked through IKEA and we bought two of them. Once we got home we tried them out, both of our phones (iPhone 14 Pro) charge for a few minutes before they stop. We tried multiple power bricks, nothing would fix it. It’s a shame because I love the look of this, and positioning my phone on the charger is easier than the traditional wireless chargers. Manual could also be improved, there is a status LED that was blinking when our phone stopped charging. The manual only list this as error. No troubleshooting is listed. 1
Mixed- Max owners read Melinda B. Will only charge my pro max 13 in landscape position if my Appel OEM MagSafe case is on. If I remove the case it will charge upright but intermittently. My husband 12 pro max with same Appel OEM case will charge in landscape and also upright intermittently, with case on. So if having your phone upright is important to you and you have Max be aware thismight not be the charger for you. 4
doesn’t charge every time ANDRE Sometimes I check the Phone and it’s not charging. Its beautiful but not useful as I expected 2
Attractive and modestly priced charger Nancy While it may not charge as fast as some others, it works well for charging overnight. I think it’s more attractive than others, so I don’t mind having it on my nightstand. 4
Works great on my Pixel 3 JS M. I have a Pixel 3 and it works perfectly. The little grey strip on the wood base keeps the phone in place nicely, and the charging connects well, though it’s not fast charging. A Pixel XL fits on the stand but I don’t have one with wireless charging capabilities to be able to test. The grey back (the wireless charger) can be removed from the wood base (the USB cable runs through the bottom and there’s a notch to allow the cable to lie flat) so you could lie the charger flat on a tabletop as well. For the price, an incredible value. Note that it does not include a USB plug adapter. but I have a million of those just lying around. 5
Position sensitive Verified Buyer Phone has to sit in a certain place or it will not charge. Design needs improvement. 1
Works with Pixel 6 Robert I. While not fast charge like the Pixel Stand (4x the price) it does do standard Qi charge with the Google Pixel 6. Fits almost like it was designed for this phone, as the camera ledge fits snug at top. 5
Great little charging stand TODD Works great with my iPhone 8 I use it to charge while I video conferencing 5
Junk Erin A. Doesn’t work. My 12 pro max is to big to line up with the charger to charge. I can lay my phone sideways in a landscape format and it will start to charge but then after a few minutes it flashes an error code. I knew a wireless charger for under 20 was too good to be true. 1
Doesn’t work days after first use erin t. I began using this product this Monday. Today, Wednesday, it isn’t working. It doesn’t keep a constant charge. As I’m writing this review, it is flickering back and forth between charging and not charging. What a waste of money. I’d like to return but I’m pretty sure I already tossed the receipt. Great. 1